DIY Two-Colour Lino Printing
Whether we like it or not the nights are drawing in, which means it's time for some autumnal crafts towards Halloween, bonfire night and of course, Christmas! Block printing is a great way to decorate your own cards, invitations and wrapping paper with original patterns in a rustic style.
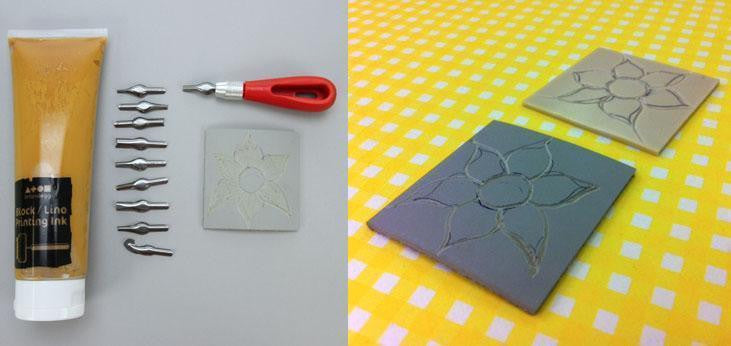
Our Lauren demonstrates an easy two-colour design, that will hopefully inspire a few of you to have a go!
Things you'll need:
Lino Cutter Set
Roller
Inking Tray
Two shades of Ink
Lino or Softcut
Paper of your choice
For extra safety, you can also use a hand guard, and a bench hook to hold your block in place while you carve.
1. First, you'll need to choose a design that can easily be split into two colours, Lauren decided on an easy flower and drew out roughly the same template on both of my blocks. She then cut around the outline. 
2. On the lino (darker grey) block, she carved out the petals, leaving the centre of the flower and the background solid. On the soft cut, she did the opposite, carving out the background and centre but leaving the petals. 
3. Next, squeeze a little of your first colour out into your inking tray and roll it out until it is even. 
4. Then ink up your background block with the roller and place it face down on your paper, rolling or pressing on the back to get an even print. 
5. Wash and dry your tray a roller, giving the first colour a little time to dry, and then repeat steps 3 and 4 with your second colour.  ...and there you have it!
  Your very own two colour lino print.
Got any questions? Give us a shout and we'll be happy to help. Also post your prints here in the comments, we'd love to see what you have been printing.


Leave a comment